This is a complete Meta XR SDK setup in Unity, from scratch to a Quest-ready scene — including the version trap that breaks a lot of setups before they even start. The good news: once the packages are right, the setup is genuinely simple, because Meta ships prefabs you just drag into the hierarchy. This post follows the video above step by step, with a screenshot at each stage.
Table of Contents
Before you start: Unity account and Unity Hub
This guide assumes Unity itself is already in place. If not, it is quick: create a Unity account, download Unity Hub, and install a Unity Editor from the Hub. Everything below happens in the Hub first, then inside the editor.
Which Unity version? Use 6.3 LTS, not 6.5
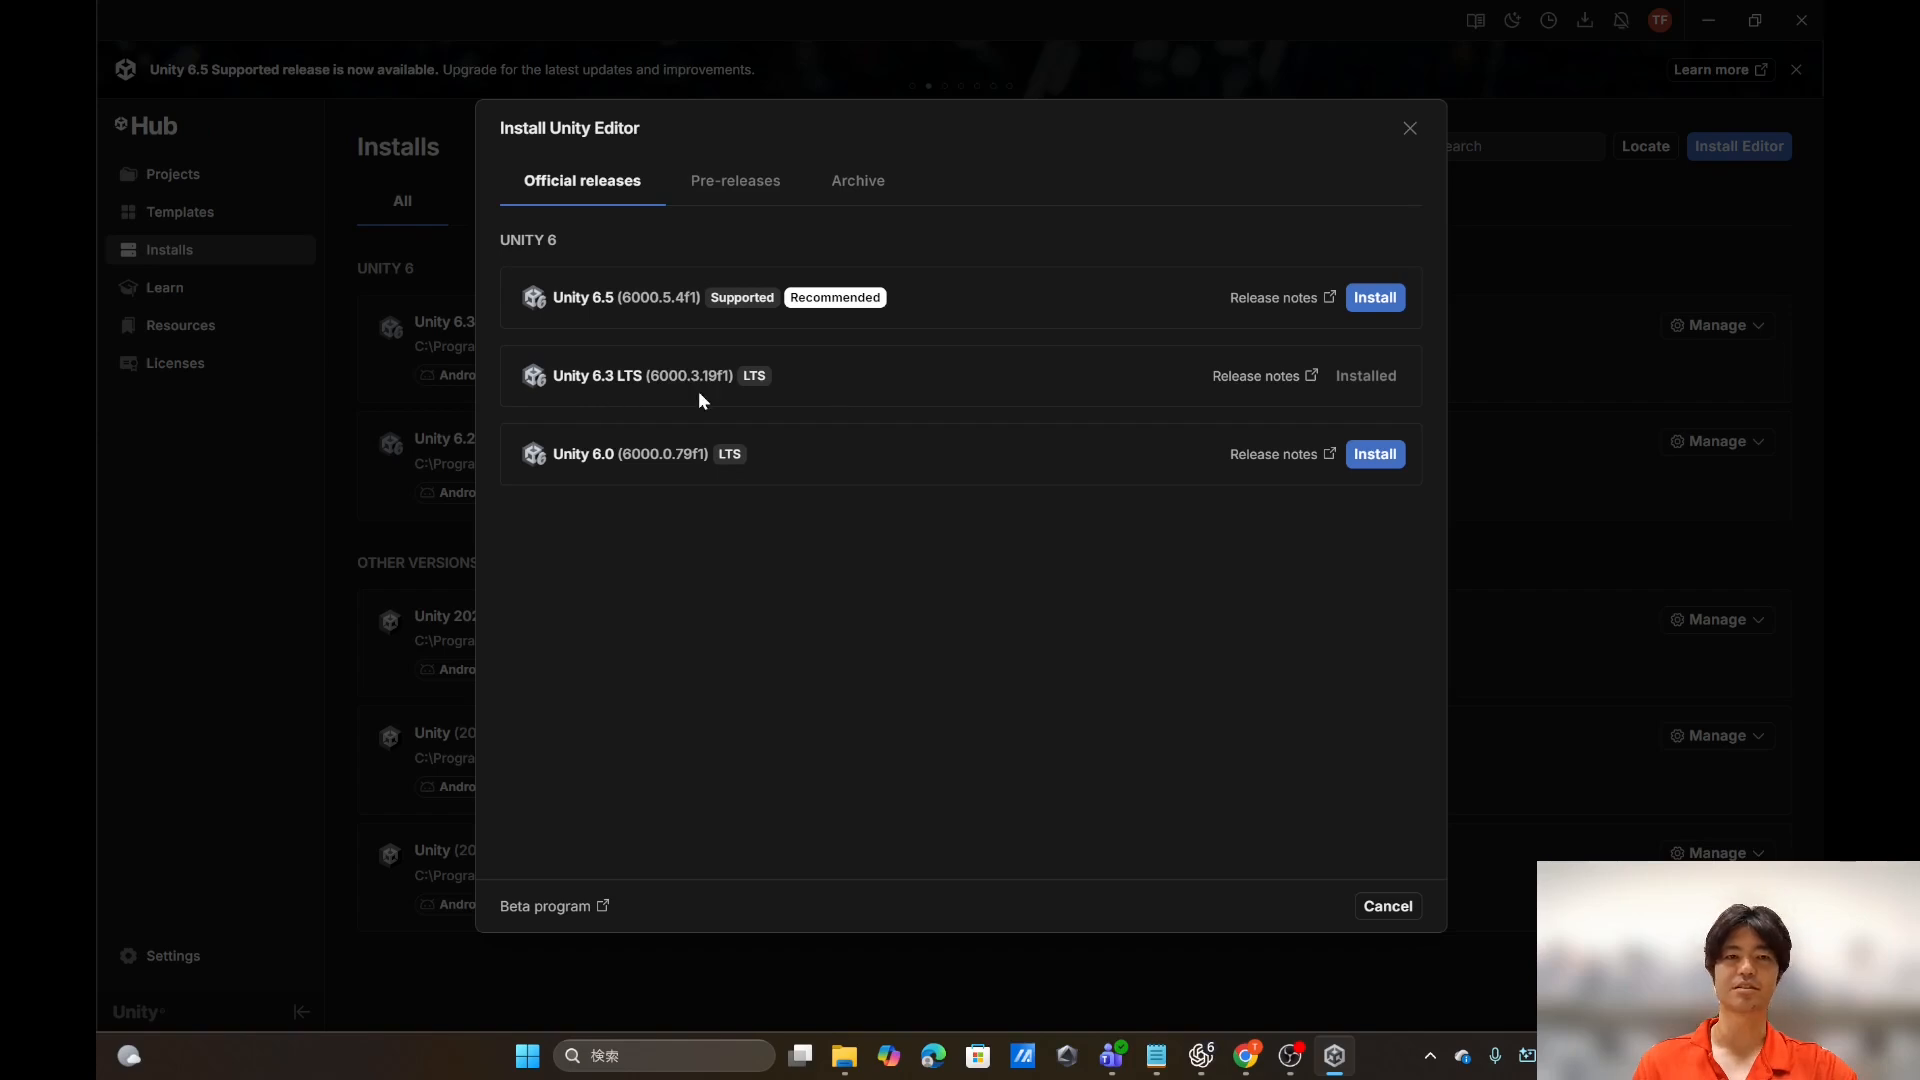
This is the trap. At the time of recording, Unity 6.5 (6000.5.4f1) is the latest release and the Hub cheerfully labels it Recommended — but there is an incompatibility between the Meta XR SDK and Unity 6.5. Install Unity 6.3 LTS (6000.3.19f1) instead. Take the version the Hub recommends and you can lose an evening to errors that have nothing to do with your project.
Install the Android module (Quest is Android)
Unity is multi-platform — you can build for Android, iOS, Windows, WebGL and more — and each target needs its module. Meta Quest runs Android, so if you want to build a Quest application you must add the Android module alongside the editor. Do it while installing the editor; without it, nothing will build later.
Create the project (Universal 3D)
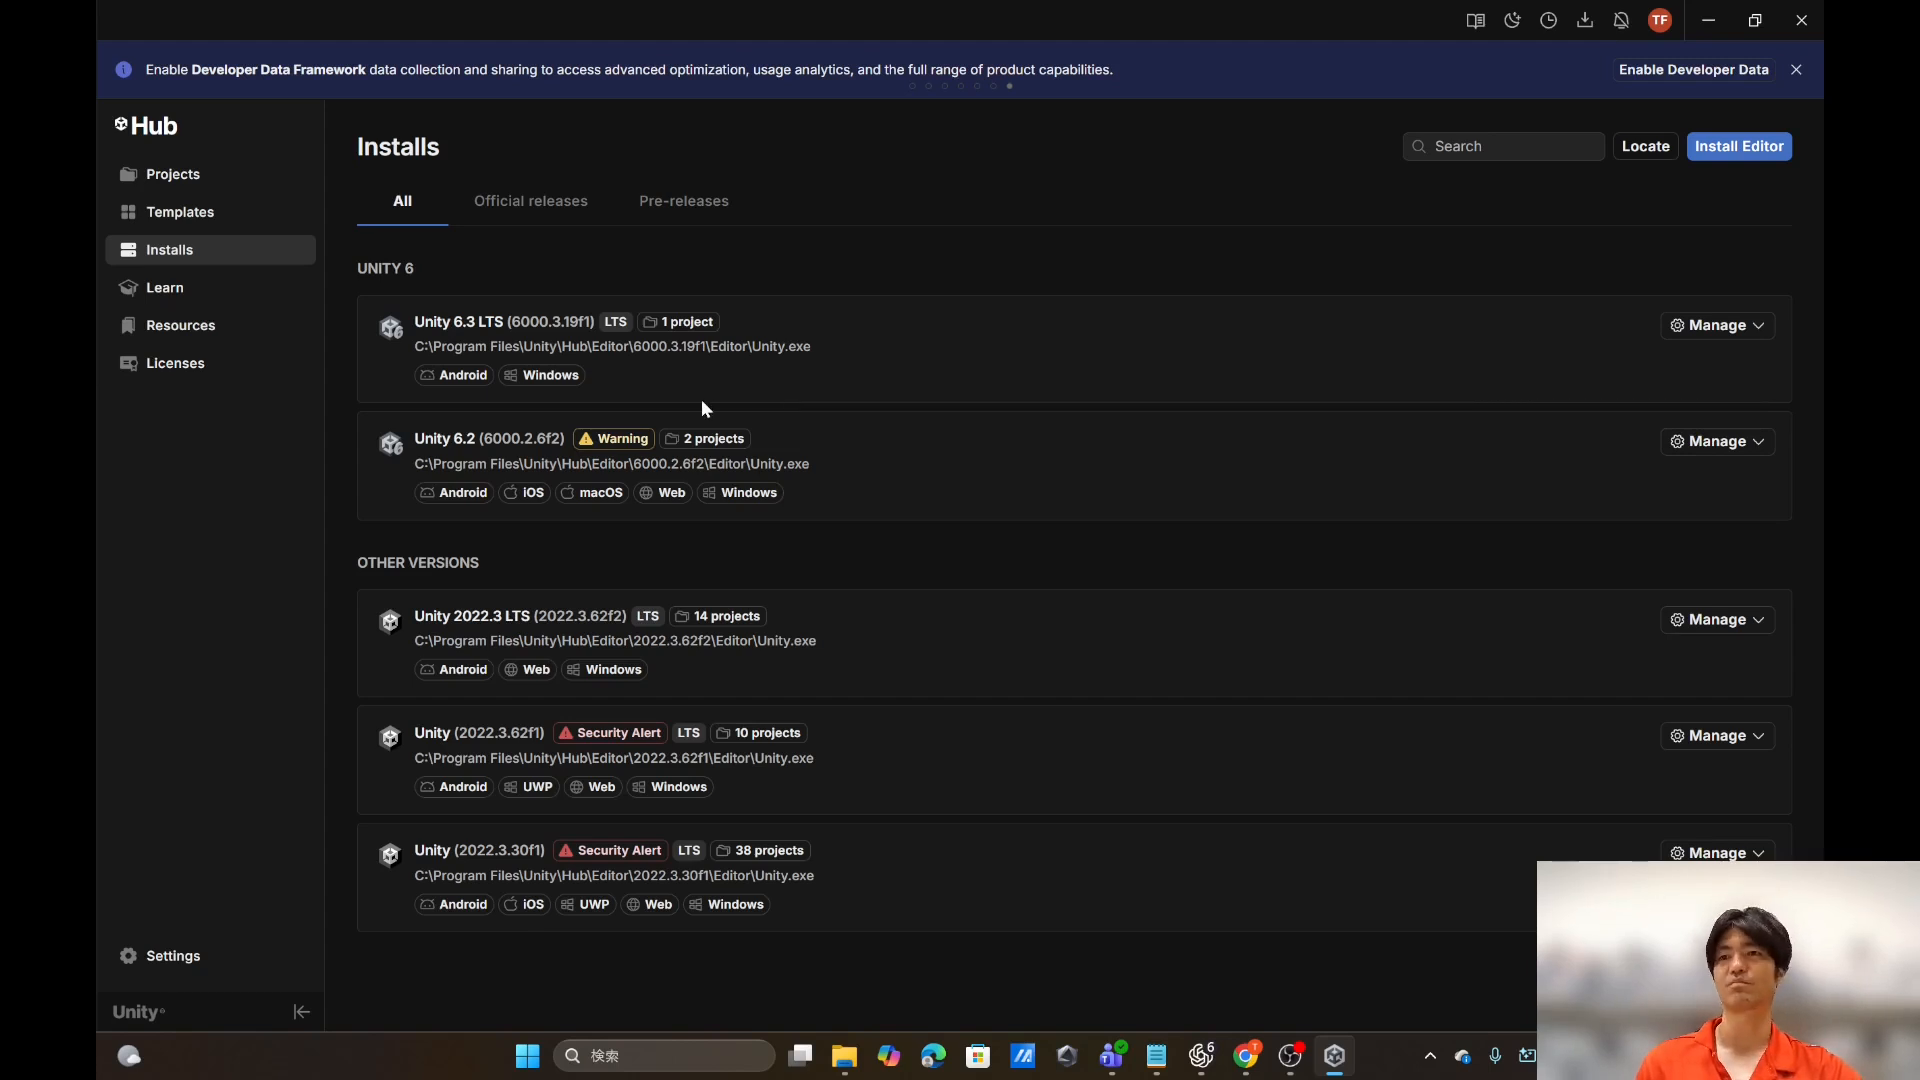
With the right editor installed, create a new project using the Universal 3D template — the URP blank template, which is the sensible default for Quest work. Name it, pick a location, and create.
Install the Meta XR All-in-One SDK
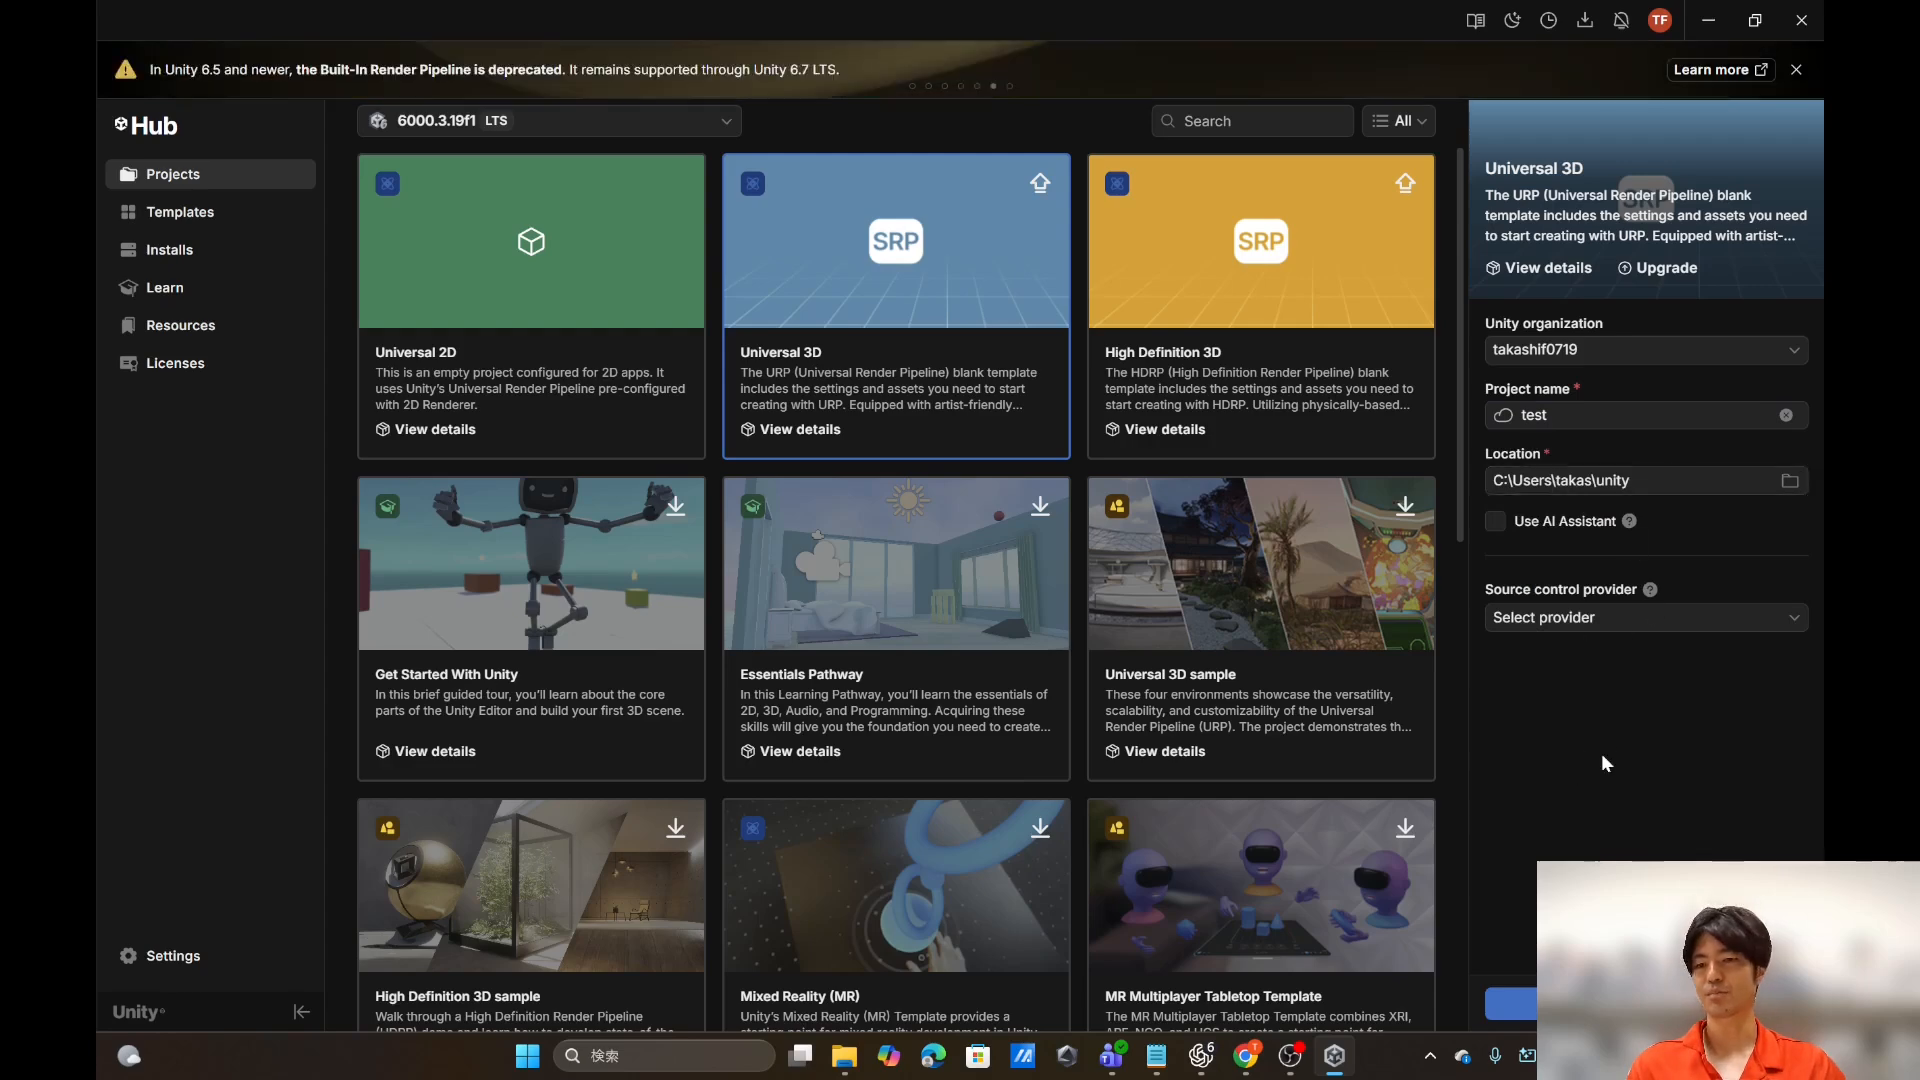
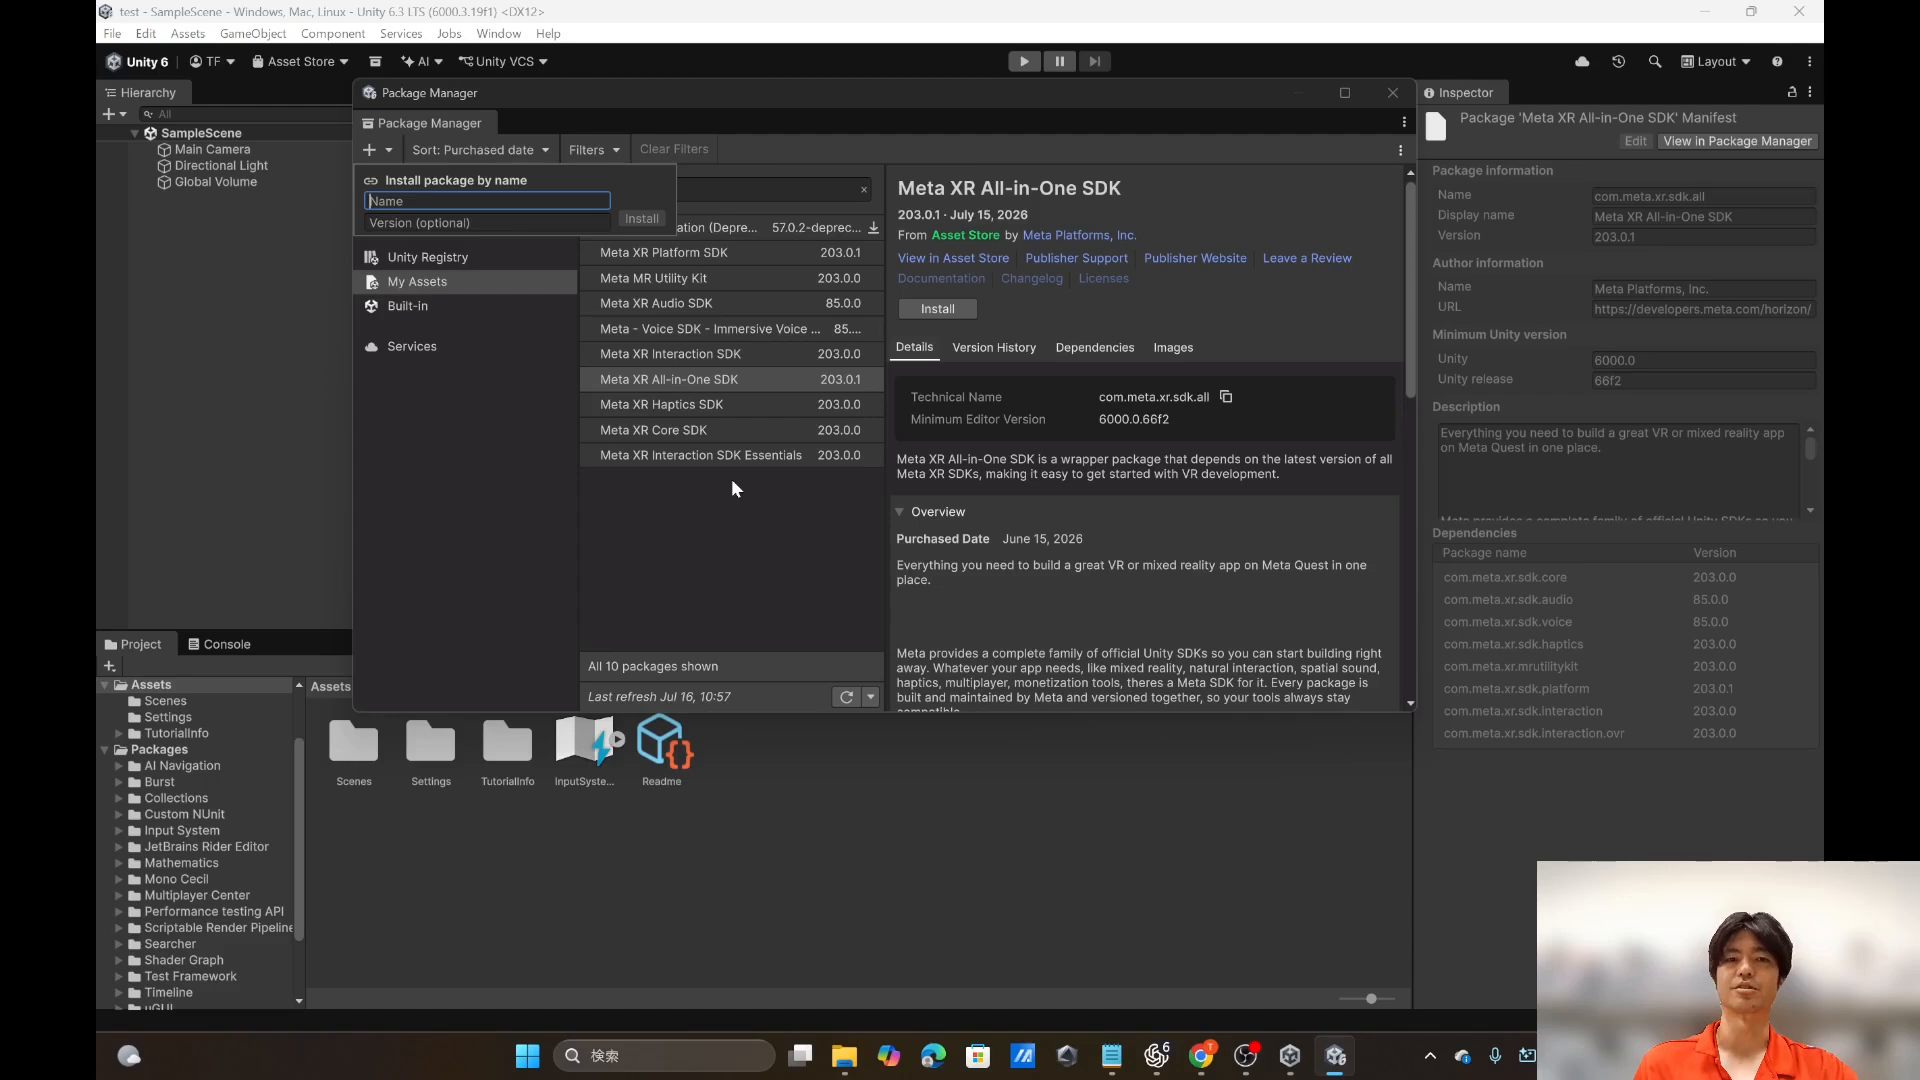
Meta ships a family of separate SDKs — Core, Interaction, Audio, Voice, Haptics, Platform — and the Meta XR All-in-One SDK is the wrapper package that pulls in all of them, versioned together. Get it from the Unity Asset Store (add it to your assets), then open Window → Package Manager, find it under My Assets, and install. You can also install it by name: com.meta.xr.sdk.all.
The version used here is 203.0.1, which lists a minimum editor version of 6000.0.66f2 — another reason the editor choice above matters.
As soon as it is in, the SDK offers its Project Setup Tool (also under Meta → Tools). It lists the required and recommended project settings, and a single Fix All click applies them. This is the tedious part of XR setup, done for you.
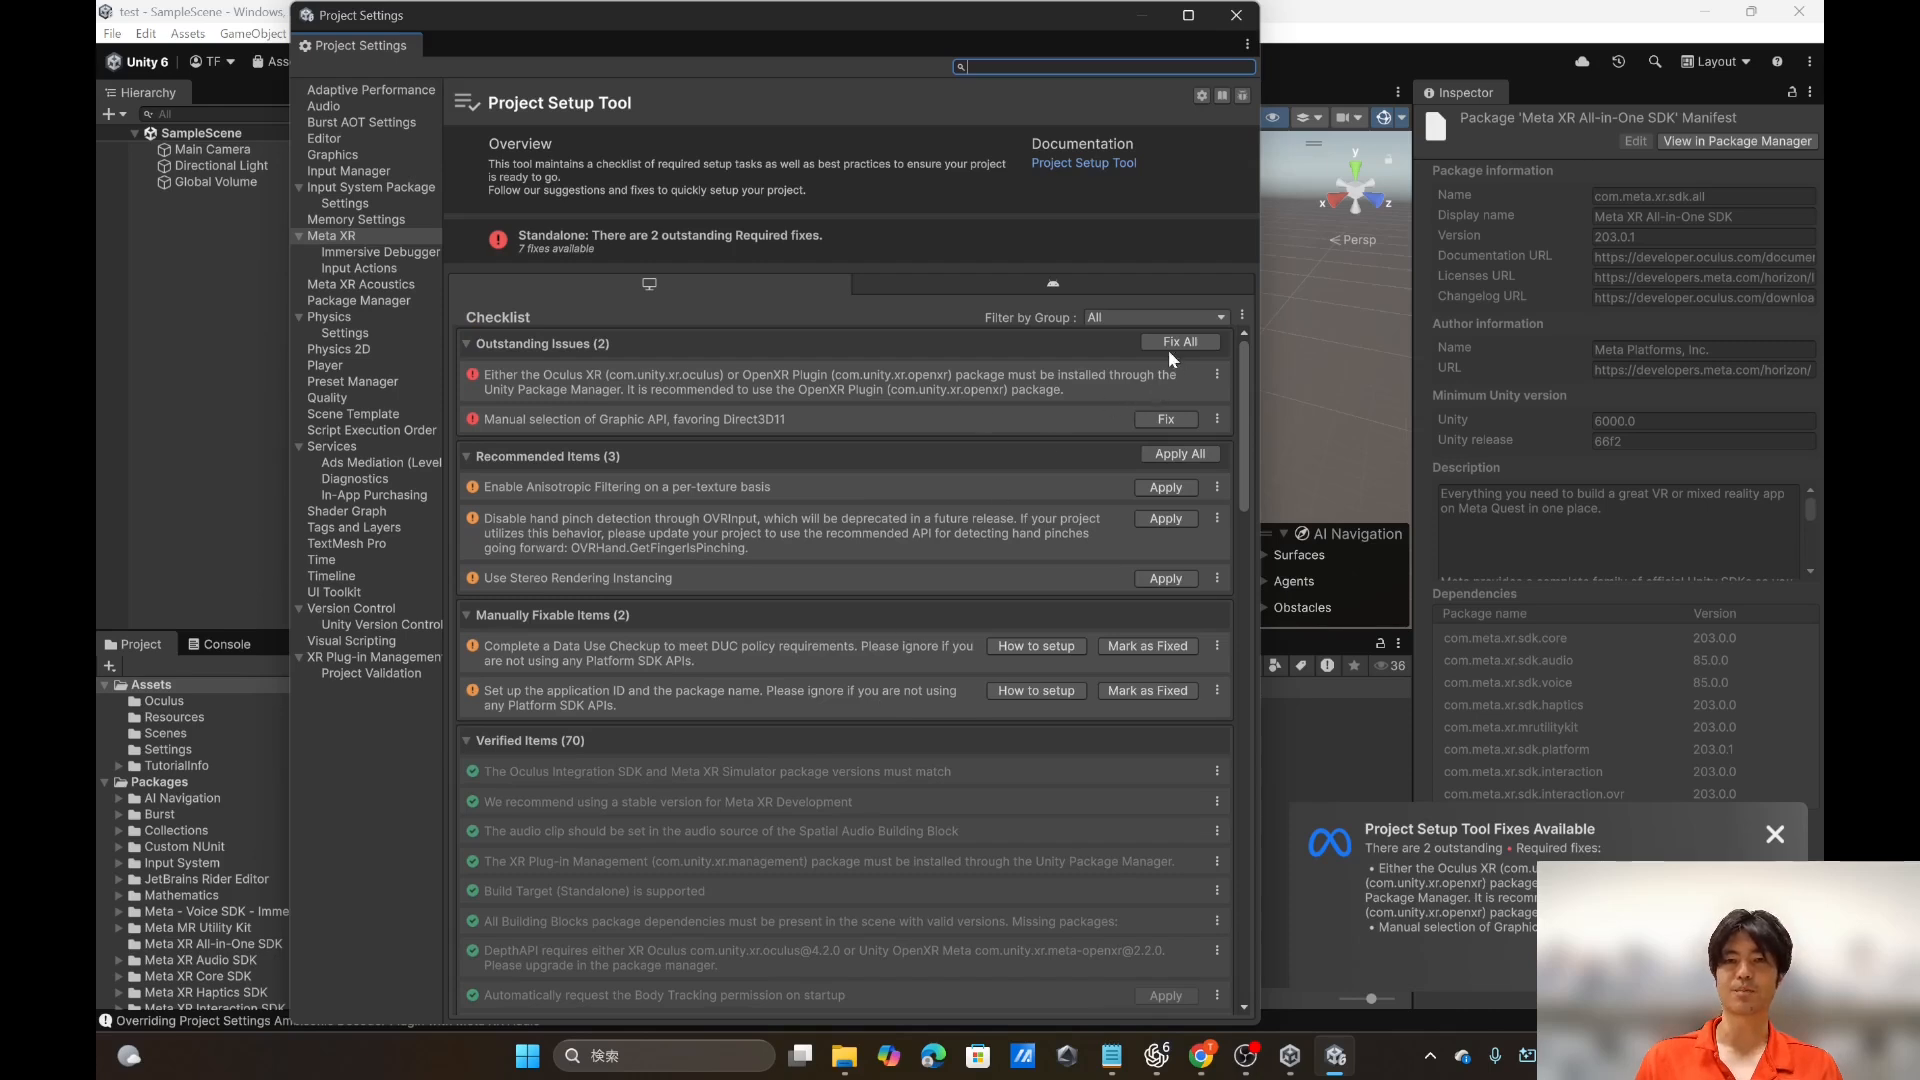
Oculus XR vs OpenXR — which one and why
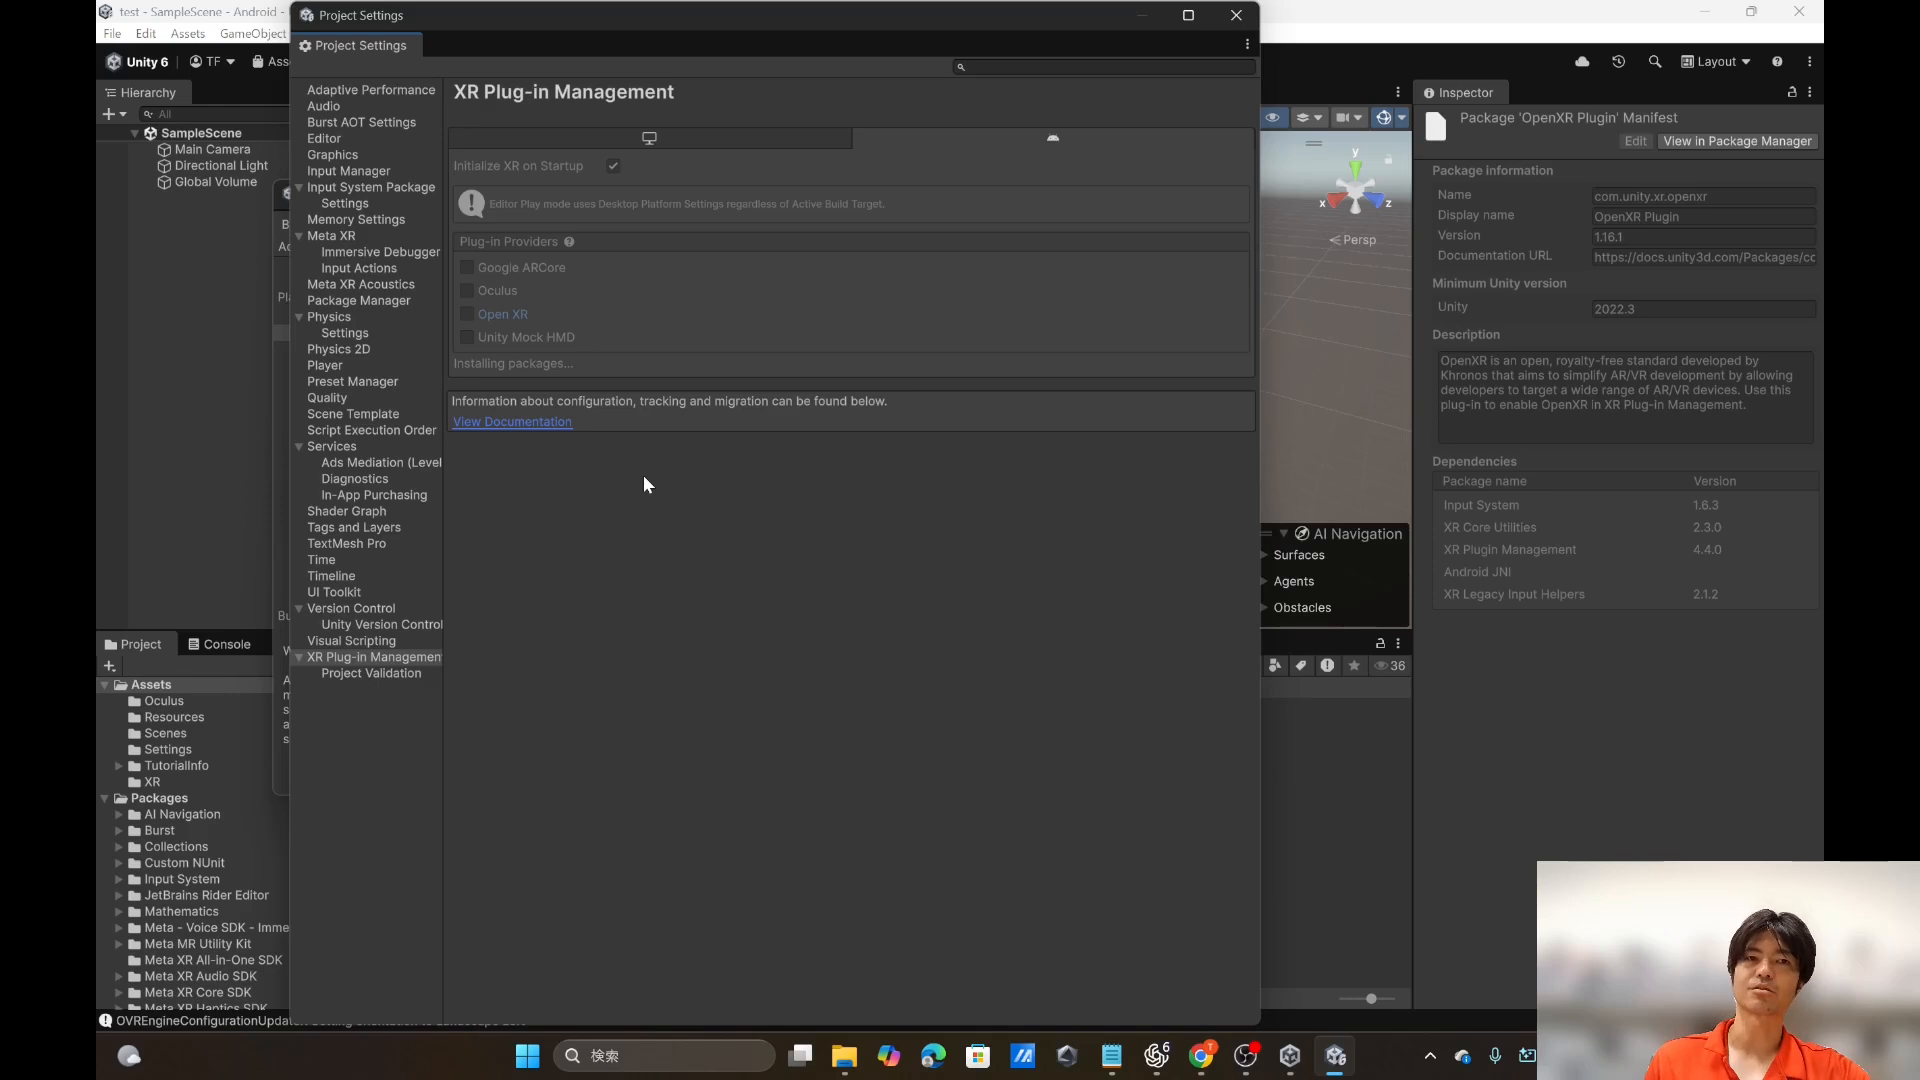
Under XR Plug-in Management you will see two providers, and it is worth understanding the difference. Oculus XR is Meta’s own plugin, from back when the company was called Oculus — they built it themselves and supported it first. OpenXR is the open, cross-vendor standard, not just for Meta but for XR devices generally.
Meta is shifting to OpenXR and now states that it is the more supported path, with Oculus XR being deprecated. You can still use the old provider, but for anything new — and for the future — choose OpenXR.
Switch to Android and enable OpenXR
Two settings, in this order. First, File → Build Profiles/Settings and switch the build platform to Android — because that is what Quest runs. Then open Edit → Project Settings → XR Plug-in Management and tick OpenXR, which installs the OpenXR plugin.
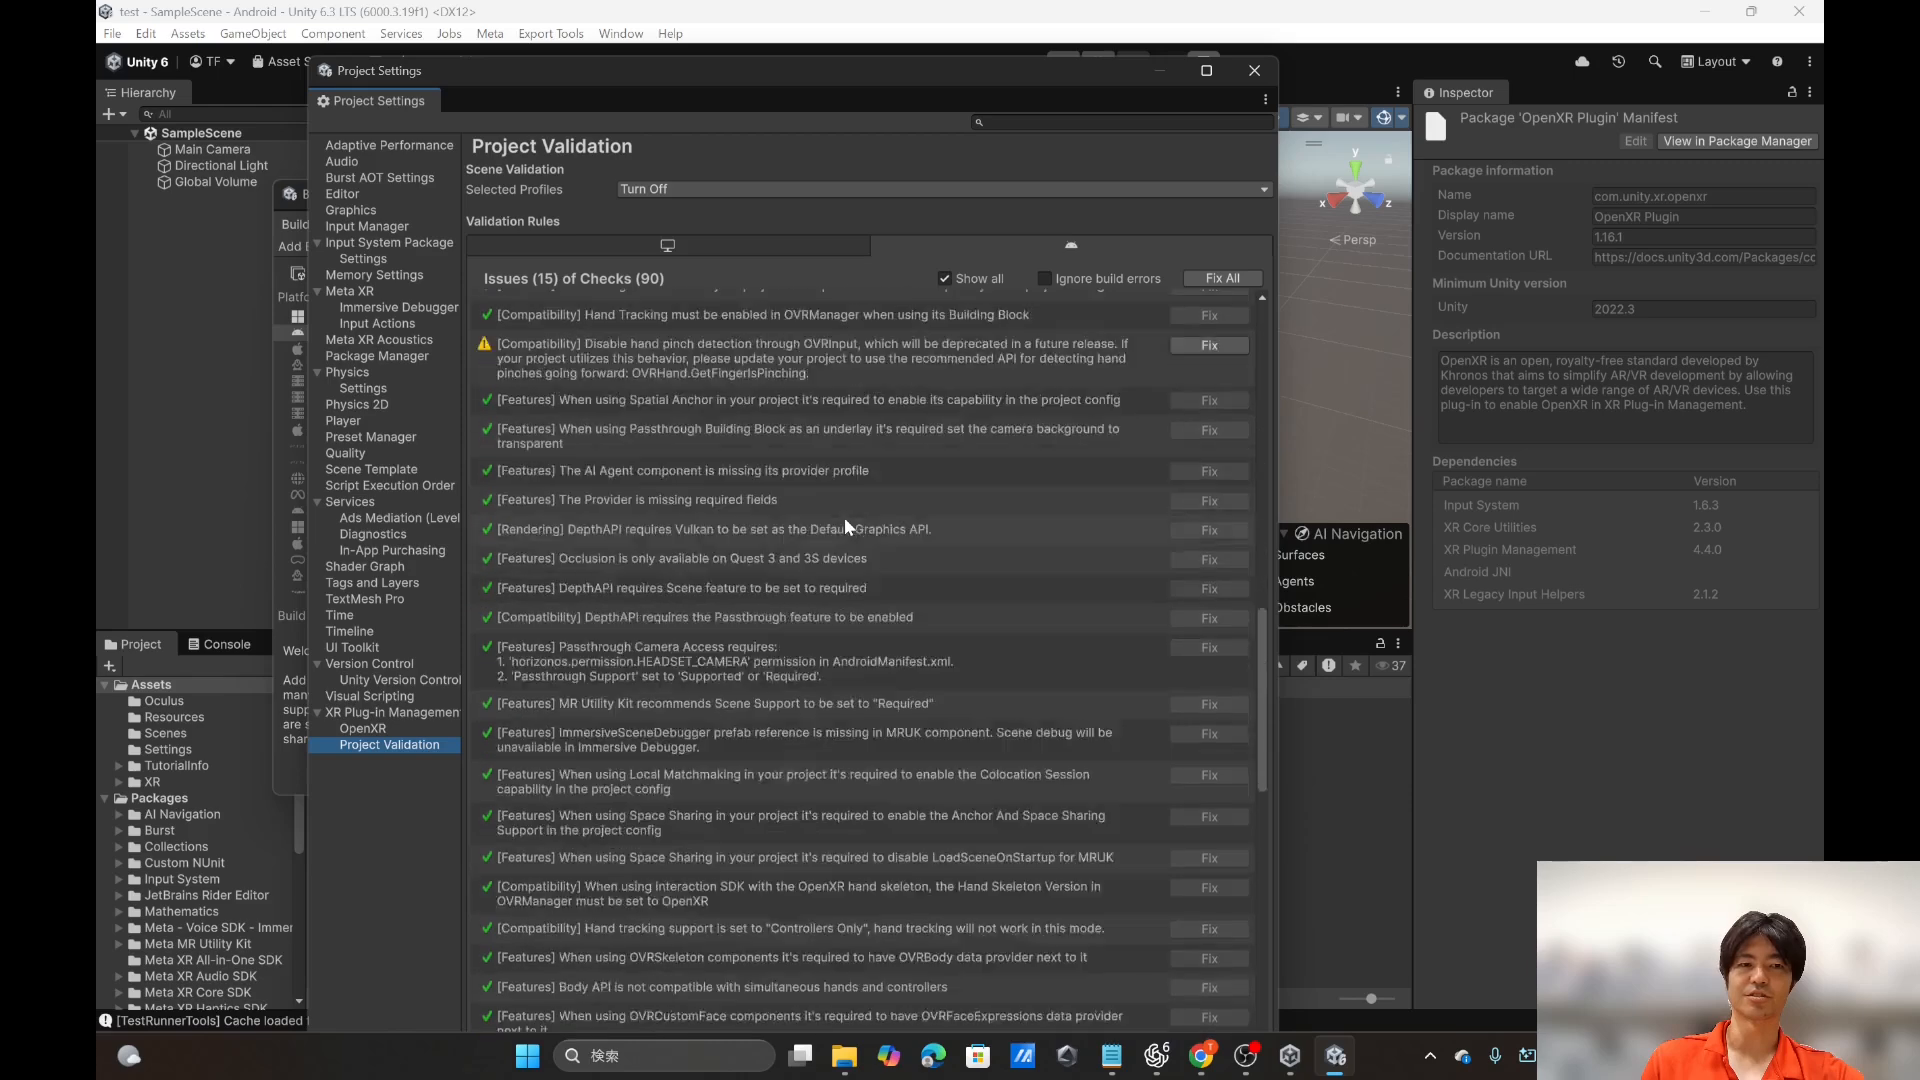
Now the other half of the automation: Project Validation. It runs a long list of checks and flags whatever is still misconfigured — in this run, 15 issues out of 90 checks. Hit Fix All and it corrects them automatically. It takes a moment and recompiles scripts; afterwards, re-check the Project Setup Tool too and Fix All anything left. Then it is clean.
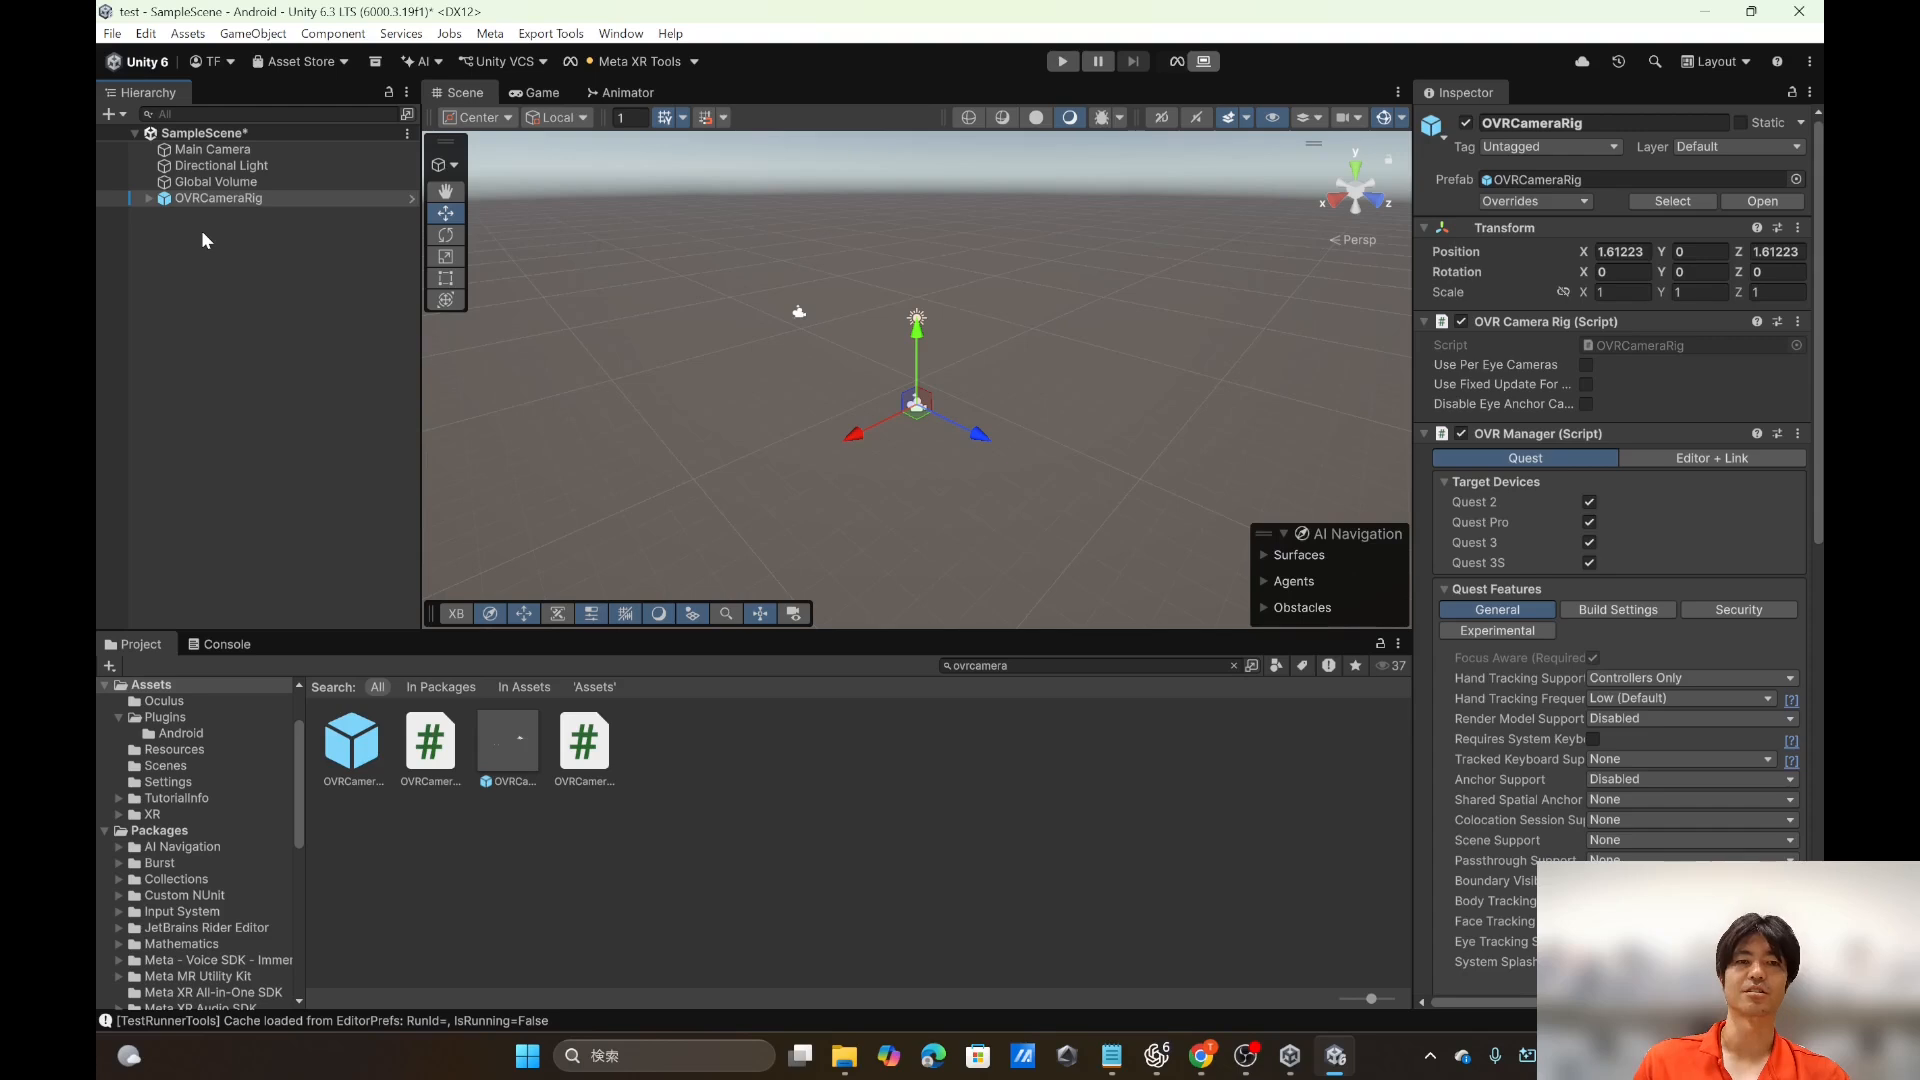
Add OVRCameraRig and the interaction rig
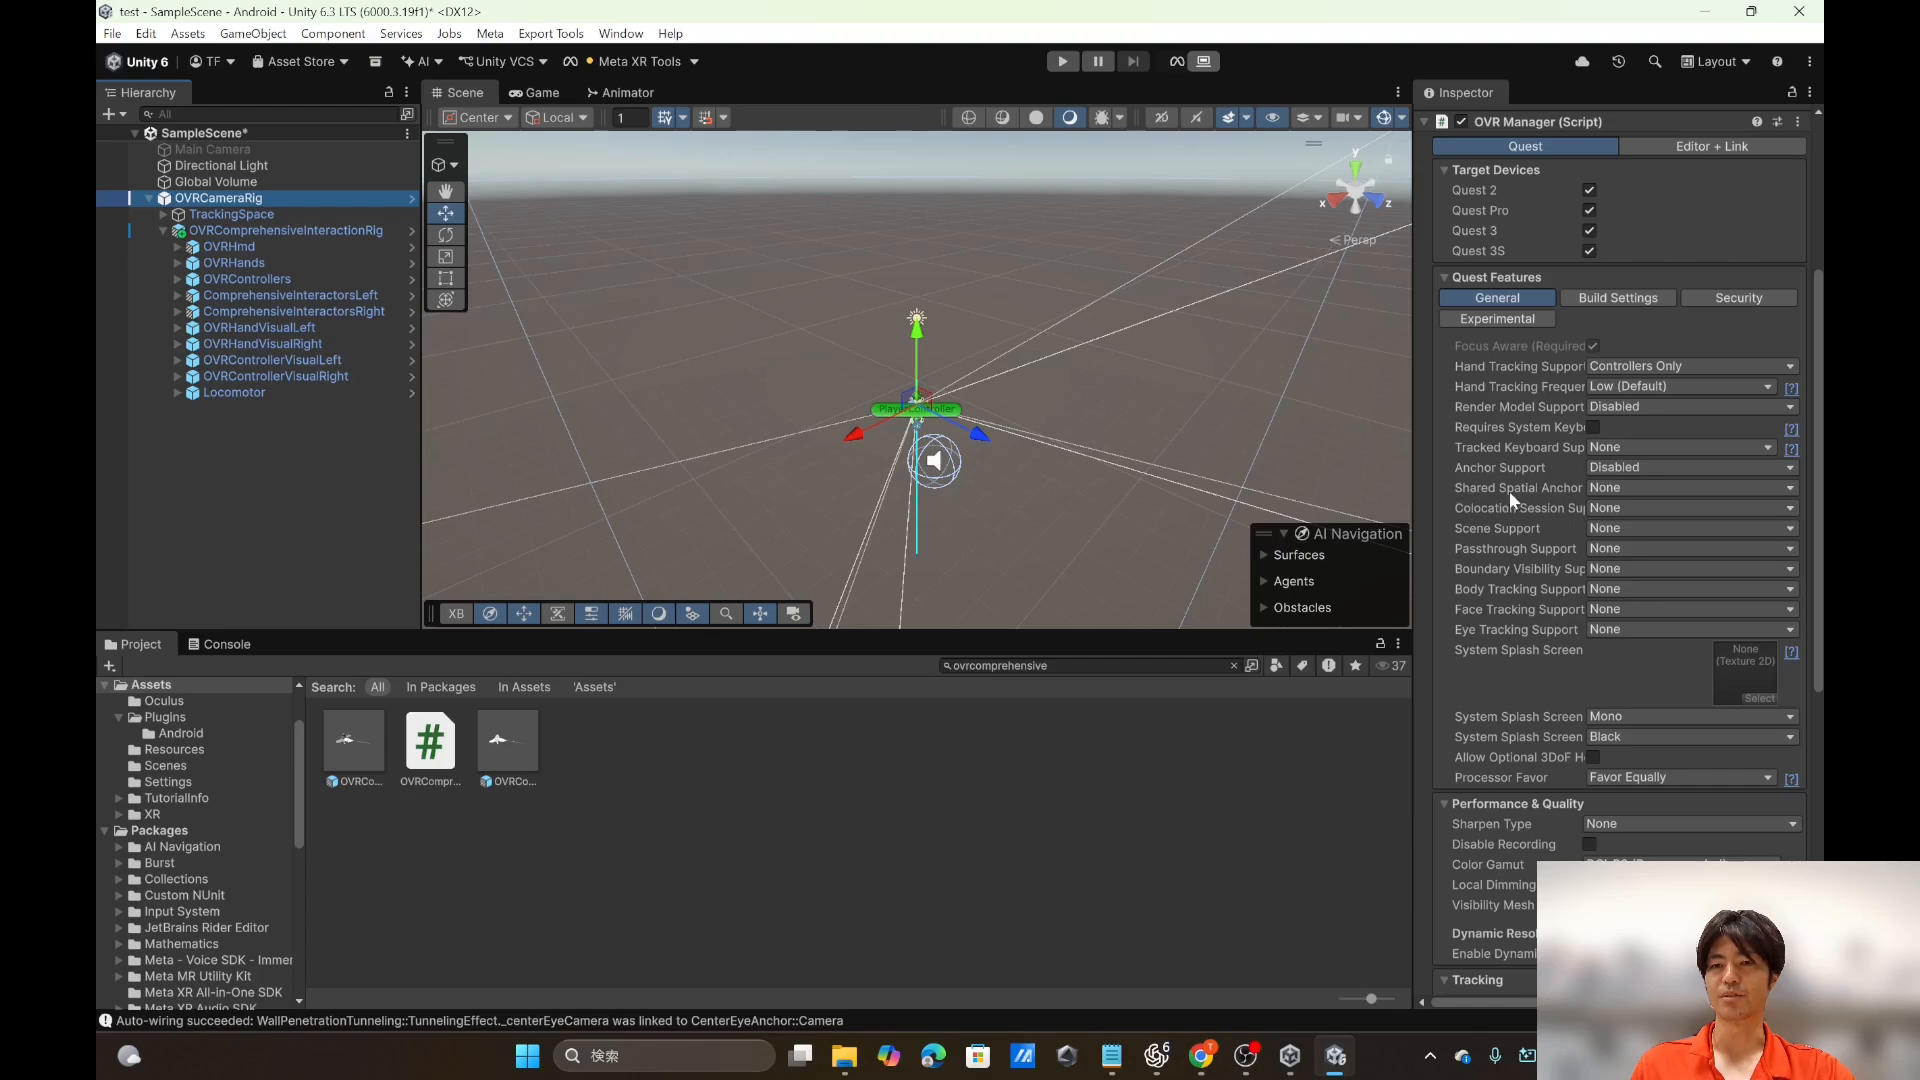
Here is why this is easier than it looks: the Meta XR SDK ships prefabs, so you just drag them into the hierarchy. Search for OVRCameraRig — and note that the Meta content lives under Packages, so search in All or In Packages, not just In Assets. Drag it into the scene and disable the Main Camera, since the rig brings its own. Its OVR Manager component is where the Quest target devices and features live.
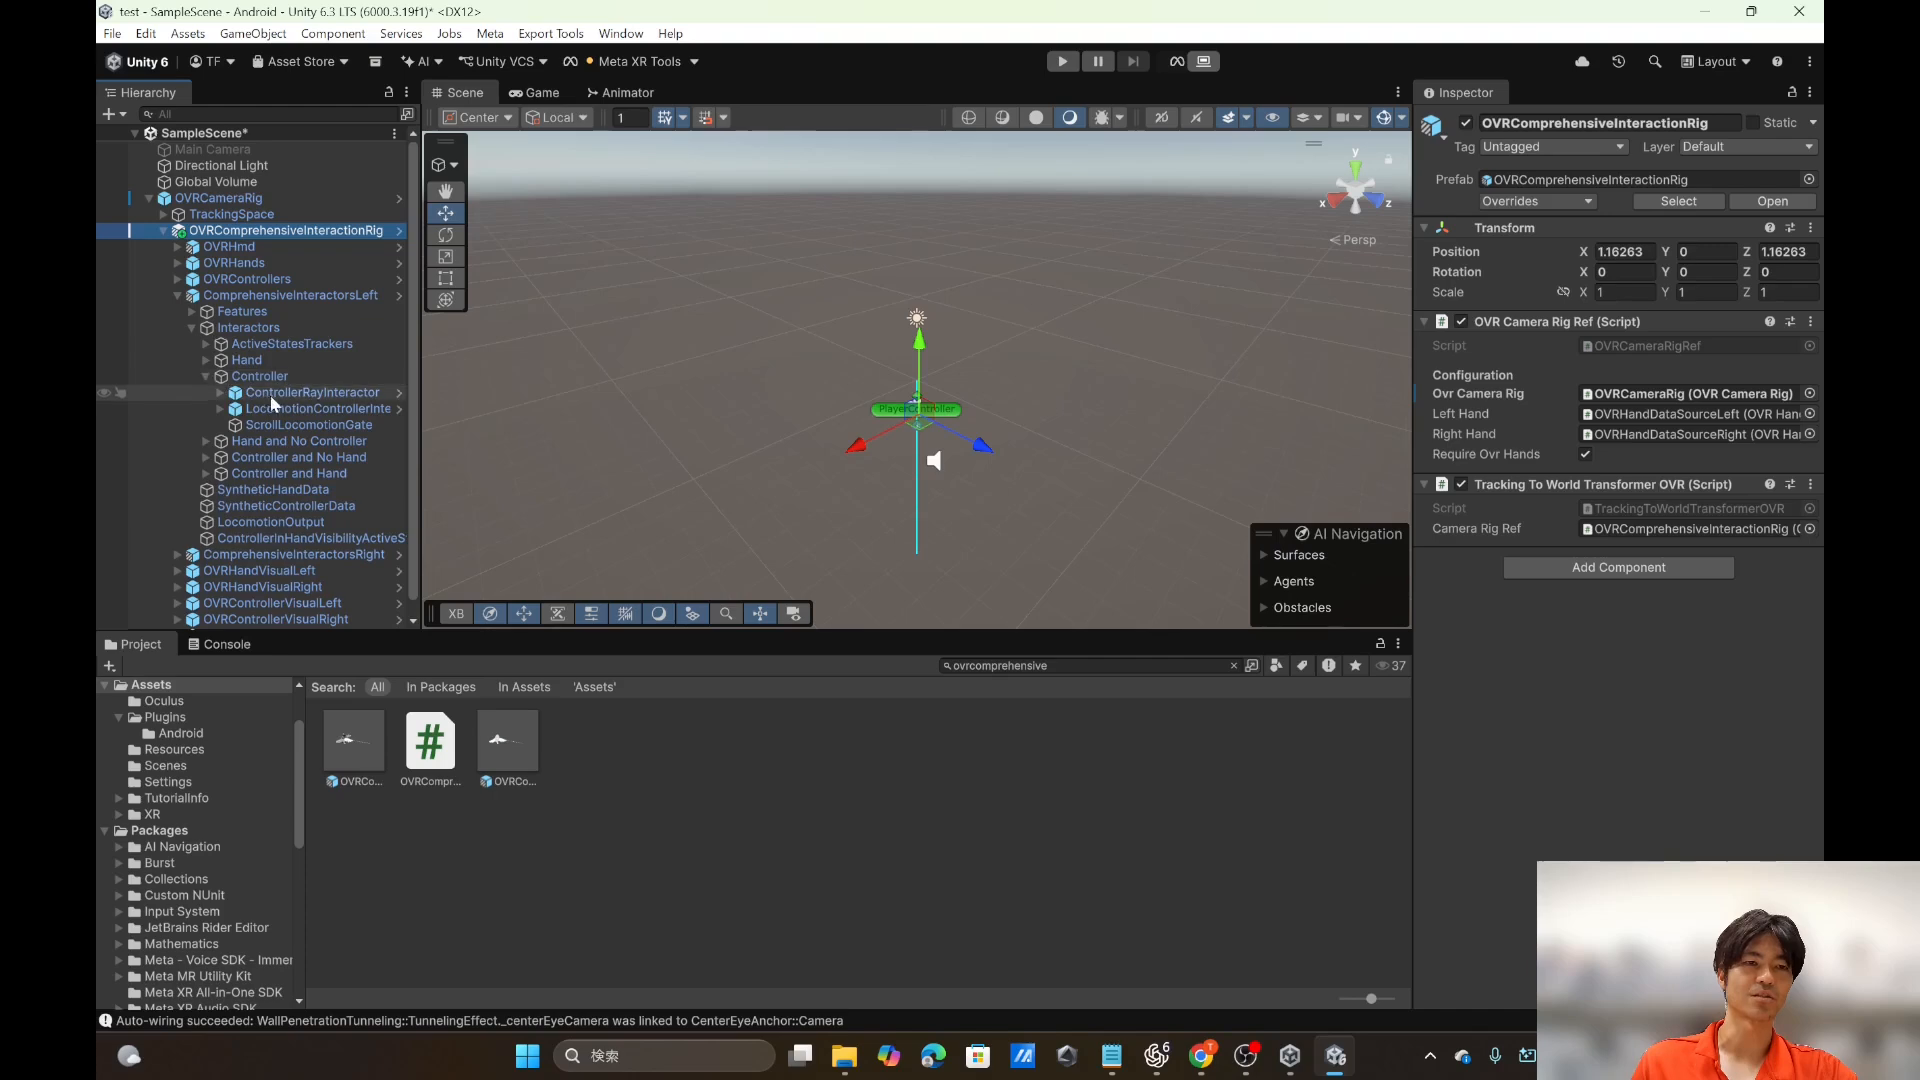
For anything interactive, drag in OVRComprehensiveInteractionRig. One prefab gives you hands, controllers and interactors — including the Ray Interactor, which is what lets you point at UI or grab objects at a distance. Expand it and you will find the whole tree: OVRHmd, OVRHands, OVRControllers, and the interactor sets for each side.
Finally, the features everyone actually wants are toggles on the OVR Manager’s Quest Features: passthrough for mixed reality, plus body, face and eye tracking. Turn on what your app needs and leave the rest off. On-device body tracking is markerless pose estimation in its own right — if you want to see how it compares with camera-based methods, see our overview of 3D markerless motion capture approaches.
Frequently asked questions
Which Unity version works with the Meta XR SDK?
Use Unity 6.3 LTS (6000.3.19f1). Unity 6.5 is newer and the Hub marks it “Recommended”, but it has an incompatibility with the Meta XR SDK. The All-in-One SDK 203.0.1 also lists a minimum editor version of 6000.0.66f2.
Should I use Oculus XR or OpenXR for Meta Quest?
OpenXR. Oculus XR was Meta’s own plugin from the Oculus era and is being deprecated; Meta is moving to OpenXR, the open cross-vendor standard. The old provider still works, but OpenXR is the future-proof choice.
Why do I need the Android module for Meta Quest?
Meta Quest headsets run Android, so Quest builds are Android builds. Without the Android module installed with your Unity Editor — and the build platform switched to Android — the project will not build to the headset.
Wrap-up
That is a working, Quest-ready scene: the right editor, the Android module, the Meta XR All-in-One SDK, OpenXR, and the two rigs. The setup is genuinely simple once the packages are right — the Project Setup Tool and Project Validation do the fiddly parts, and Meta’s prefabs do the rest. From here you can start building, and turn on passthrough or tracking as you need it.
Takashi Fukushima — Sports Science & Pose Estimation.
▶ Subscribe on YouTube · Website · ORCID · Contact