This is a foundational overview of motion capture and performance analysis — what motion capture is, how markerless pose estimation compares to the traditional marker-based systems, what biomechanics you can actually extract, and how to set up a capture. It’s the conceptual map for the hands-on tutorials elsewhere on this site.
Traditional (marker-based) motion capture
Traditional motion capture is marker-based: you place markers on the body and track them with multiple cameras. It started in film (the actors in black suits and markers) and was later adopted by sports science, where it became the gold standard for kinematic analysis. It is genuinely accurate — which is why new systems are validated against it — but it comes with real costs.
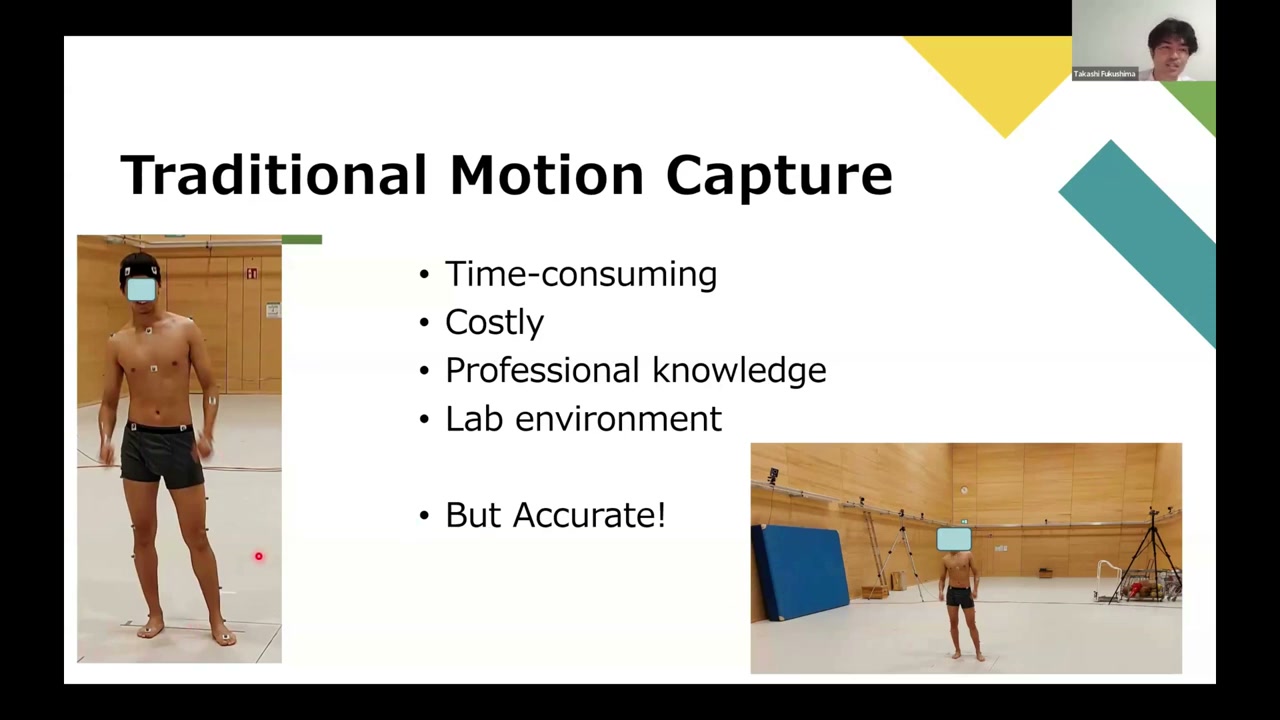
- Time-consuming — ~40 markers placed precisely, plus body anthropometry measurements
- Costly — each camera is $2,000+ and you need several
- Professional knowledge — marker placement and camera calibration
- Lab environment — and you can’t put markers on athletes at official competitions
- But accurate — the reference standard
Markerless motion capture (pose estimation)
Thanks to computer vision, we can now do markerless capture with pose estimation — AI that detects human joint locations directly from a video or image. You just record a video, run the model, and analyze. It’s easy, fast, affordable (a smartphone is enough), and usable almost anywhere — which matters, because real performance happens at real competitions, not in a lab. The trade-off is that accuracy is still being established.
Models and coordinate systems
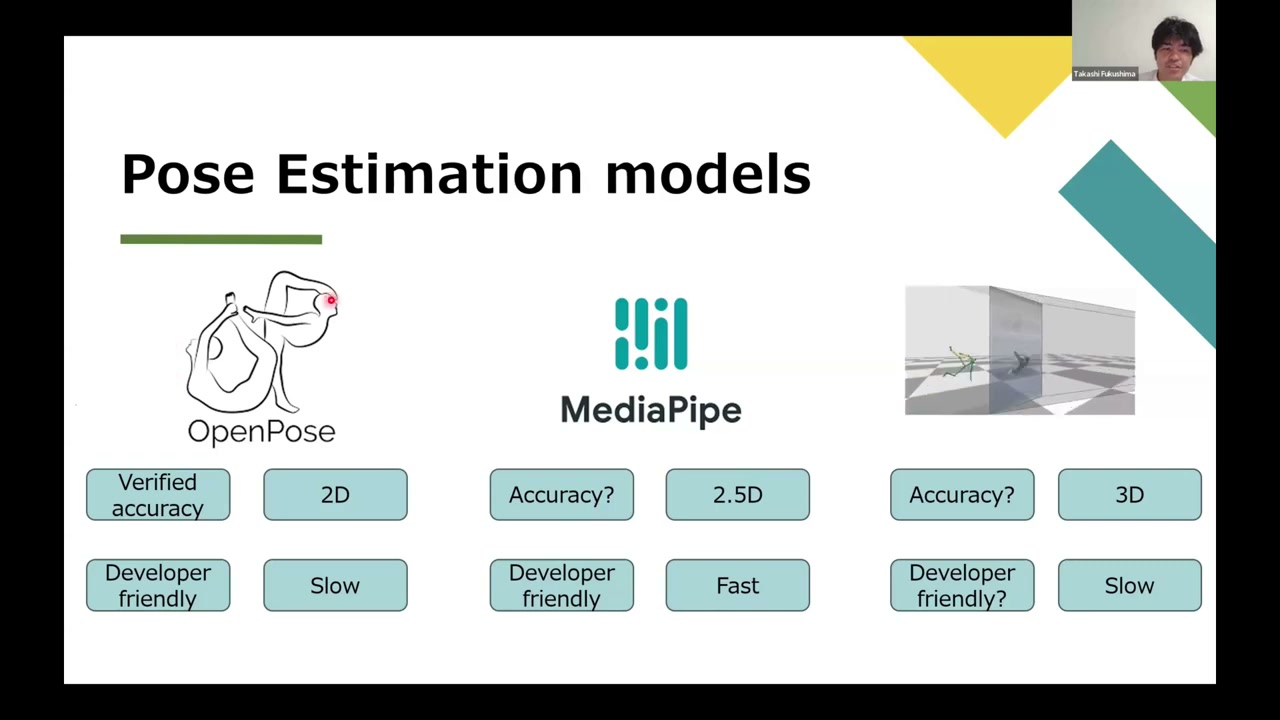
- OpenPose — the most-researched model; 2D pixel keypoints; developer-friendly; a bit slow.
- MediaPipe (Google) — fast and mobile-friendly, but 2.5D: it gives 3D relative to the hip centre, which is always the origin. That means you can compute joint angles, but you cannot measure absolute displacement (step length, stride length).
- MeTRAbs — true 3D with absolute coordinates from a single camera, so you can measure displacement.
The lesson: pick the model by the variables you actually need — 2D vs 3D, absolute vs relative, and how fast it must run.
How accurate is it?
In validation studies against a Vicon marker-based system, pose estimation typically shows around 10° of error. In an eyeball comparison that’s barely detectable; for clinical diagnosis it can be far too much. So it depends entirely on the application.

Where does the error come from? Three main sources:
- Occlusion — the model only knows what the camera can see; a limb hidden behind the body has to be guessed.
- Training data — if the motion you care about isn’t in the model’s training set, it struggles.
- Systematic difference — and this one is subtle. A marker-based system tracks markers on the skin, then uses your anthropometry to estimate the joint centre (an indirect measurement). Pose estimation detects the joint centre directly from the image. Because the two methods measure fundamentally different things, there’s a consistent offset — which is a big part of that averaged error. In fact, papers sometimes overstate pose-estimation error for exactly this reason.
Biomechanical analysis: kinematics vs kinetics
Kinematics is motion without force. From joint positions you get angles; take the derivative for (angular) velocity, and again for acceleration. (For example, at 60 fps a 10° change between frames is 600°/s of angular velocity.)
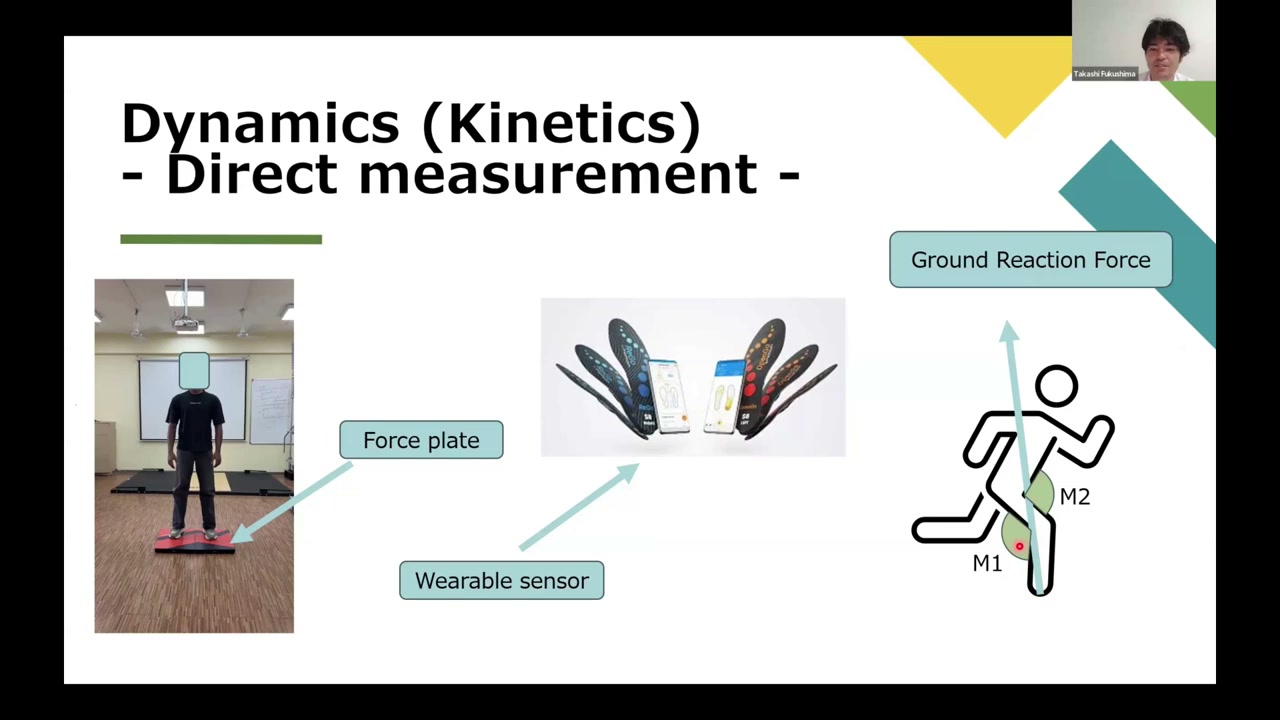
Kinetics (dynamics) is motion with force. You can get force three ways: direct measurement (a force plate for ground reaction force, or wearable insole sensors like Moticon, which also let you compute joint moments); inverse dynamics (working the moments back from the ground reaction force); or simulation with the free, Stanford-built OpenSim, which estimates ground reaction forces and even muscle activations from the motion data. (A pure Lagrangian-mechanics route exists too, but it’s complex.)
Frameworks: how to set up a capture
- Single camera — easy and cheap. Great when 2D is enough (e.g. a 2D analysis of a soccer kick). Less accurate.
- Single camera + a depth sensor — a stereo camera derives depth from the fixed baseline, focal length, and disparity; a time-of-flight sensor (on recent iPhone Pro models) measures depth from how long emitted light takes to return — higher resolution, but it can’t measure very dark objects that absorb the light.
- Multiple cameras — the route to accurate 3D. Because a single video loses the depth axis, you recover it by 3D reconstruction: calibrate each camera’s pose (position + rotation) with a calibration cage, a chessboard, or a scan-based method (ARCore), then triangulate the crossing point of the projection lines from all cameras (via singular value decomposition). More setup and cost, but occlusion is covered by the extra views, so it’s the most accurate.
(The full multi-camera 3D-reconstruction pipeline — calibration, triangulation, and simulation — is exactly what the OpenPose & 3D reconstruction series builds step by step.)
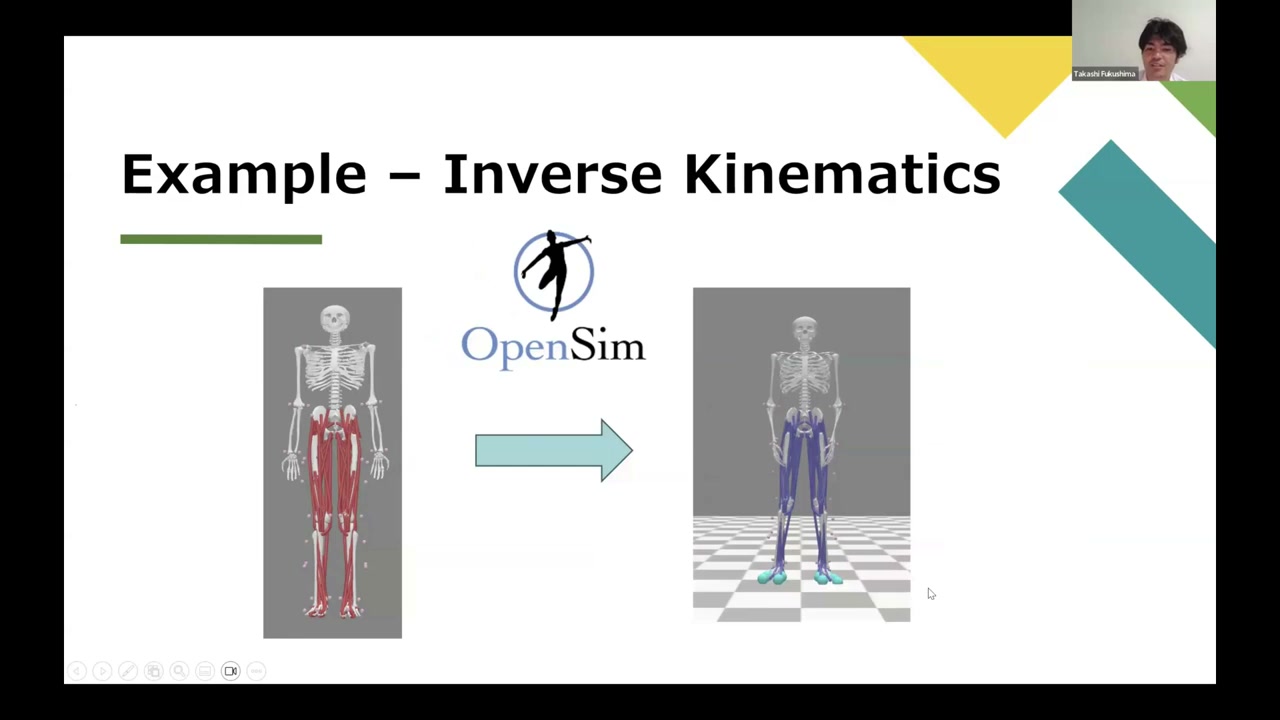
A practical example: from one camera to a full simulation
Here’s how far you can get from a single camera. Run the MeTRAbs model to get 3D keypoints, trim them to the OpenPose topology, then use OpenCap’s LSTM model to augment that into a fuller marker set (adding points around each joint so you can compute rotations, not just positions). Scale a generic OpenSim model to the subject, and run inverse kinematics and inverse dynamics — giving you joint motion, ground reaction forces, and (in the next steps) muscle activations.
Takeaway
Marker-based systems remain the accurate gold standard, but markerless pose estimation has opened motion capture to anyone with a camera — with real trade-offs in accuracy and coordinate systems you need to understand before you trust the numbers. Once you do, you can go all the way from a phone video to kinematics and kinetics. For the hands-on builds, see the OpenPose & 3D reconstruction series and the OpenPose & OpenCap how-to.
About the author
Takashi Fukushima — research & development across Sports & Exercise Science, Human Pose Estimation, Computer Vision, and XR.
- YouTube (subscribe): Takashi Fukushima|Sports Science & Pose Estimation
- Research (ORCID): orcid.org/0000-0002-7318-3384
- Website: takashifukushima.com
- Contact: Get in touch